Today we will be looking at some simple commands you can add to your Streamer.bot. Starting with a simple chat command, you can build up to impressive combinations. We used Twitch and OBS as the example here but the steps should be transferable to YouTube and other broadcasting software.
If you haven’t already, make sure you set up your bot and connect it to your broadcasting software and streaming platform. You can find our tutorial for this here.
Creating Your First Command
There are several ways you can make a command in Streamer.bot and even more ways to trigger them. The way we are going to be focusing on today is a command which can be triggered by typing in chat.
Step 1: Create a new action
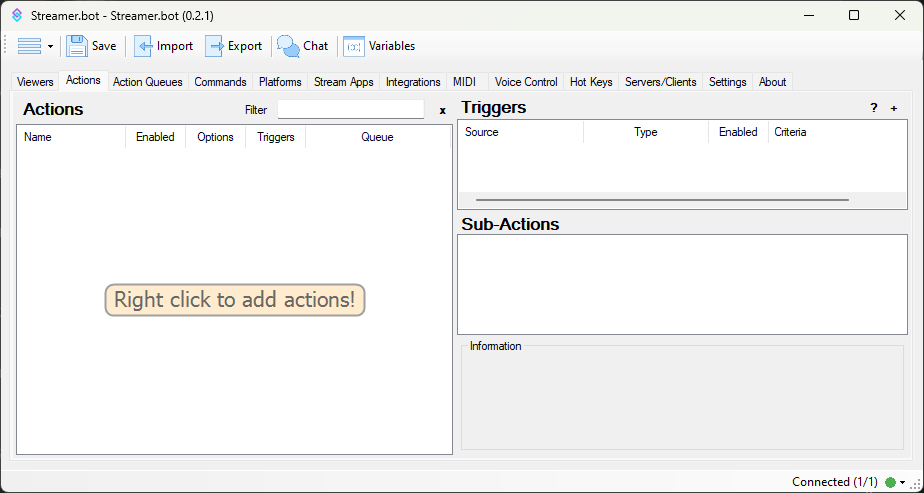
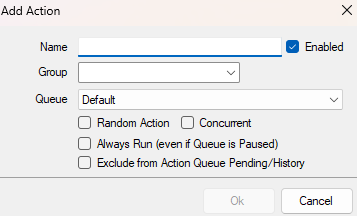
Navigate to the “Actions” tab and right-click on the left-hand square. This will give you a pop-up menu where you can customise your new action. For now the only part you need to worry about is the name of your action but it’s worth looking at some of the options for future use.
Group – adds the action to a group in the action menu for organisation
Queue – defines the queue an action will be placed in to stop simultaneous triggers
Step 2: Create a new trigger
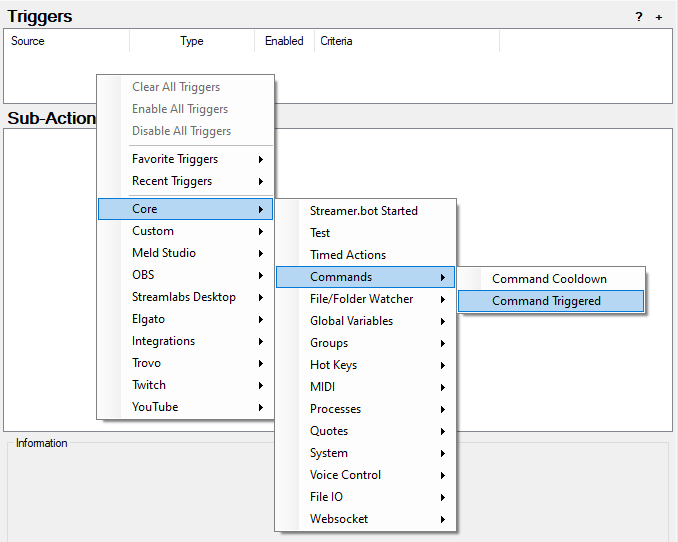
The top right-hand box links your action to a “trigger command”. Right-click in this box to open the menu and navigate through to the “Command Triggered” option:
Core>Commands>Command Triggered
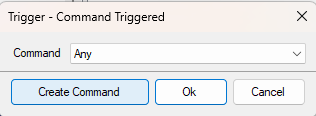
You will then get a pop-up to connect your action to a command. If you have not already made a command, click “Create Command“.
Step 3: Create Your Command
Now we need to make your command. You can do this before step 2 if you wish. There are lots of options here, but the main ones we want to look at now are the “Name” and the “Commands“.
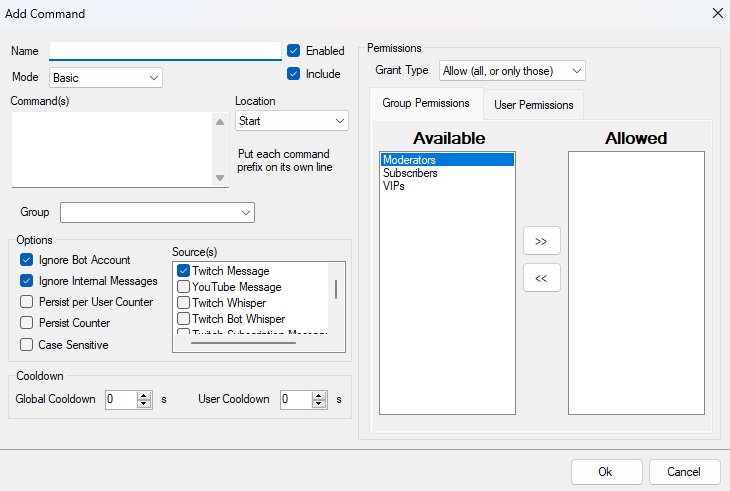
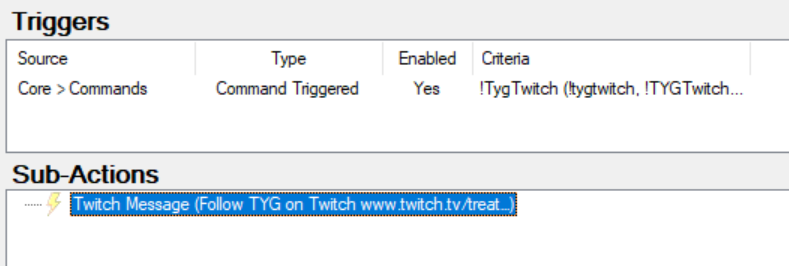
The name is for your personal database, but the commands refer to the prompts you want users to put into chat to trigger your actions. The example below is an action to show the TYG Twitch page link. By adding “!tygtwitch” and “!TYGTwitch” to the commands tab, makes them both into a “Criteria” for your trigger, meaning you can have more than one command word for each trigger.

Essentially your command words are the criteria needed for Streamer.bot to trigger your actions.
Note: You don’t have to use a pre-fix for commands, but it helps to avoid random words triggering commends by accident.
Step 3 Create your sub-actions
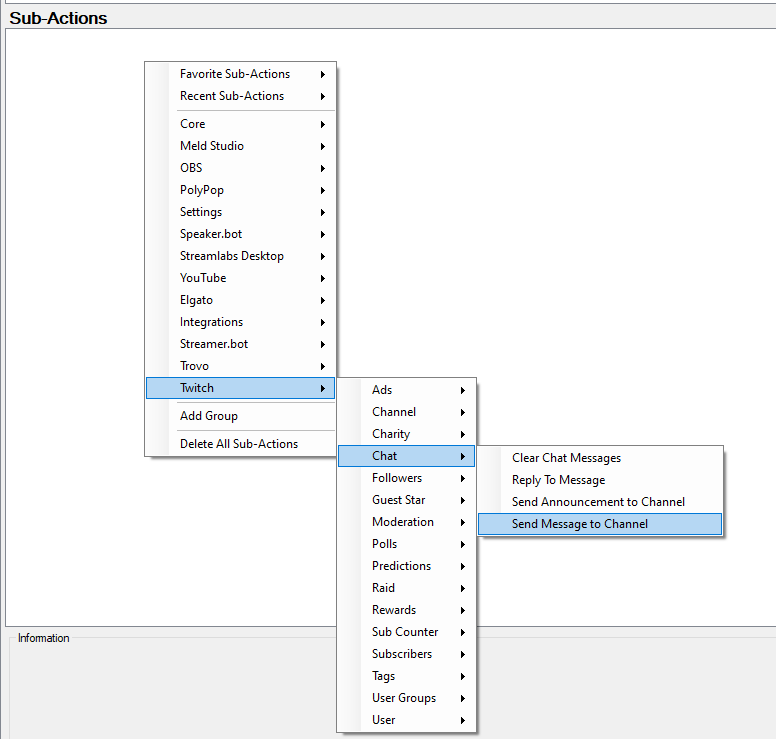
Sub-actions is where we will be breaking down all the different parts of our action for Streamer.bot to interpret and output. We only want to send a message in our stream chat so right-click and navigate to the “Send Message to Channel” option.
Twitch>Chat>Send Message To Channel
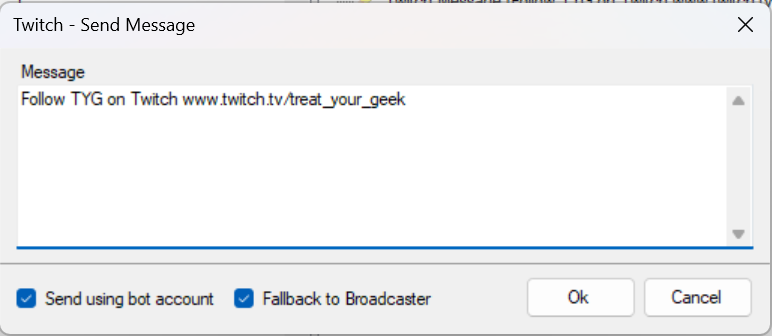
This will activate the “Send Message” pop-up where you can type in any message you wish to send. Click “Ok” and give your command a try!
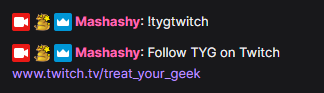
Congratulations! You’ve just made your first Streamer.bot command!
Add Media Pop-Ups
Now, let’s try something a little more difficult. We are going to try and make a media file appear on your OBS screen using a message in your stream chats. This can be a silly gif or promotional image, but the steps are the building blocks you will need to make all kinds of fun, interactive events to engage your viewers.
Step 1: Create your command trigger
Using the previous instructions, set up your command triggers and ready your action.
Step 2: Add your media files to OBS
Add your media files into OBS, making sure they are named and properly placed, and make it invisible. Loop your GIFs if they are too short to effectively place and change the settings in OBS to lower CPU and graphics requirements.
Step 3: Add Sub-Actions to Streamer.bot
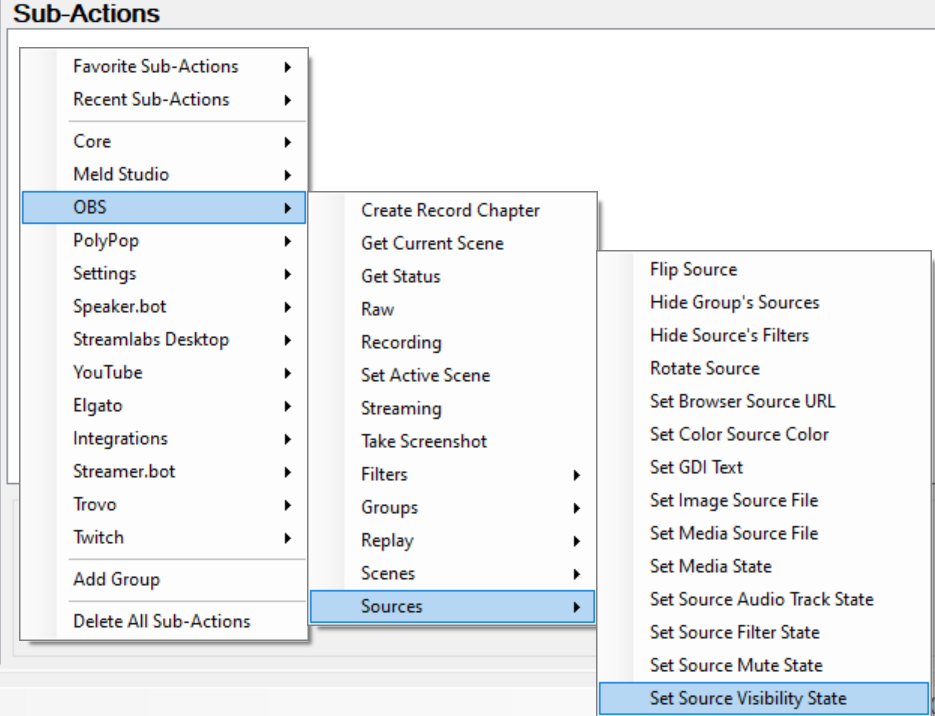
Now we want to use Streamer.bot to make your media files visible for a short period of time, before making them invisible again. We do this by right-clicking in the Sub-Actions menu and navigating to the “Set Source Visibility State” option.
OBS>Sources>Set Source Visibility State
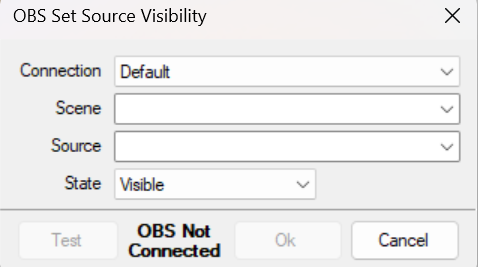
Navigate through the “Scene” drop-down menu to find the correct scene and then select the media file in the “Source“. Then in “State” clarify if you are wanting to make the file visible or not. Make it visible for the first one.
We then want to add a delay timer which is measured in ms. Depending on the length of your pop-up these generally want to be about 3000-6000ms.
You can navigate to this through right-clicking in the Sub-Actions and going to Core>Delay.
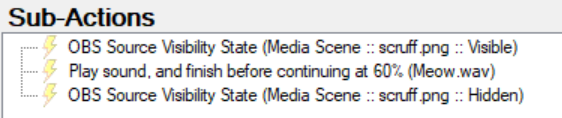
We then want to repeat the source visibility state command to make the media source invisible again.
When you are done, you should have something that looks like this:

Now try your trigger in your Twitch chat and you should see your very first pop-up in action!
Add Sound Alerts
Step 1: Set up your action & Trigger
Again, use the previous instructions, set up your command triggers and ready your action.
Step 2: Add Sound
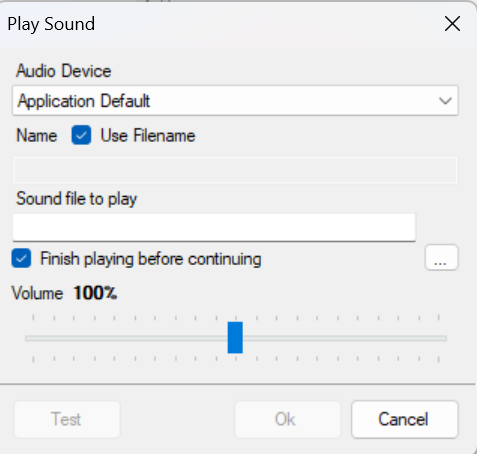
Although you can use “Play Sound From Folder” to choose different sounds, we will focus on choosing a specific sound for now. So right-click in Sub-Actions and navigate to “Play Sound“.
Core>Sounds>Play Sound

This will open a pop-up menu where you can choose the audio device and set up the file you wish to play and how loud.
Note: If you play this sound through Streamer.bot you will need to capture it to your OBS using “Application Audio Capture” or use “Desktop Audio”.
Step 3: Use to time media
Since you can click “Finish playing before continuing” on the “Play Sound” options, you can even use a sound to time the duration of a pop-up.
Type your trigger commands into your chat and you should see the sound bar moving in OBS. If you are unsure if this worked, set your track to “Monitor and Output” in the OBS sound settings.
Next Steps
Congratulations, you now have the building blocks to create a wide range of commands for your channel! Practice creating commands and actions and get to grips with these steps, and you will be a Streamer.bot wizard in no time.
Next time we will be building upon these lessons and looking at using simple codes to create personalised chat messages.
External Links & Other Tutorials To Check Out
Can’t wait for another tutorial? Streamer.bot has a vast arsenal of tips and tutorials to check out on their website.
You can find more TYG tutorials here.
Related Articles