
We’re back with another OBS tutorial to help get your stream set up and optimised for streaming. Today we’re looking at scenes and profiles in your streaming software.
While we are using OBS as our basis for this tutorial, there are similar options you can utilise in other software such as Streamlabs.
OBS Profiles
Different streams require different output settings. If you stream to different platforms from the same machine, it would become tiresome to input this data every time you wanted to hit live.
Profiles are linked to your streaming service of choice. Switching between them can allow you to stream directly to different platforms without having to sign into your accounts every time.
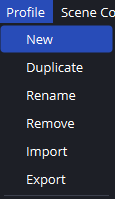
You can find these settings on OBS in the top bar under “Profiles“. Here you can add and edit your different profiles for you to switch between, but you will still have to go into your OBS settings to add in your stream keys and edit output preferences.
OBS Scene Collections
Using different scenes, you can set up your streaming software to have multiple visual layouts in one program. But what if you only want to use some scenes when you stream on a specific day or service/ This is where Scene Collections come in. .
In OBS you can find these settings under “Scene Collections“. Here you can manage your scene collections, making and deleting them as you require. Using this method, you can reduce the number of scenes and sources OBS needs to load when booting up.
Once you have made your Scene Collection, you can begin adding scenes and sources as you would normally. See This OBS Tutorial for more information.

Other Tutorials
Check out our other tutorials and level up your content today!


This is really useful!
I love how simple this makes it for people to pick up and get on with it.
<3