With the release of Streamer.bot 1.0 we will be redoing some of our older tutorials for new-comers and veterans alike. A lot of these steps are the same as before but things have moved around. So let’s delve into some basics and get your bot set up.
Step 1: Download Streamer.bot
Streamer.bot doesn’t need installing onto your PC. Instead, just download the correct folder from the website and unzip the directory into the correct location on your PC.
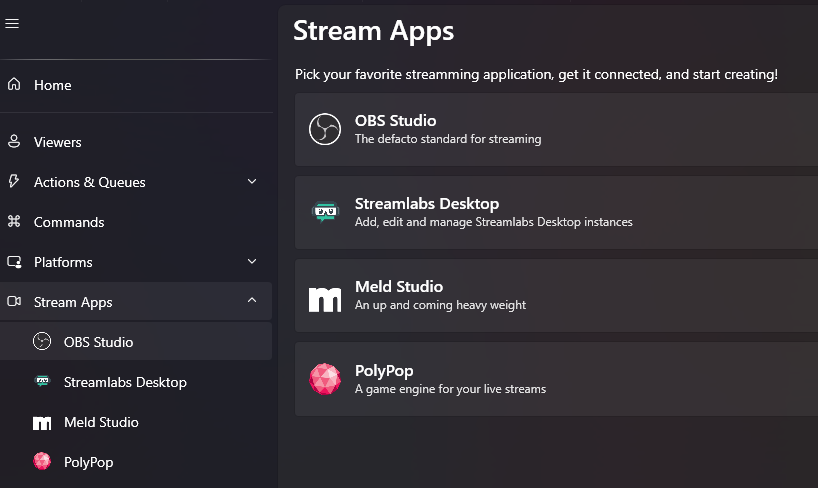
Step 2: Connect To Your Streaming Software
There are multiple streaming programs that work with Streamer.bot. We use OBS so this tutorial will show images from OBS but the steps are transferable.
Click on the streaming app of your choice to open up a secondary window.
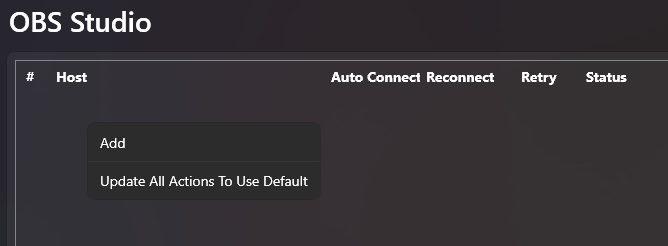
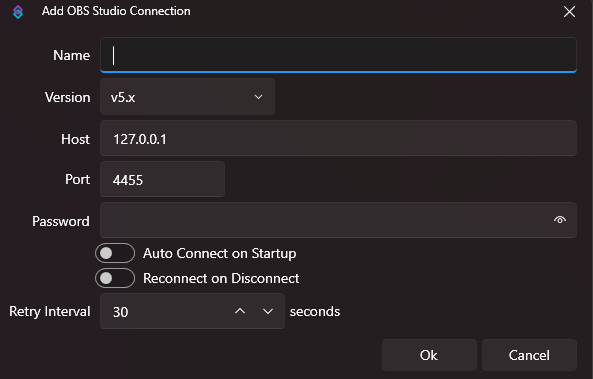
Right-click on this new window to bring up the “Add” option. This will bring up your connection settings for Streamer.bot to connect to OBS.
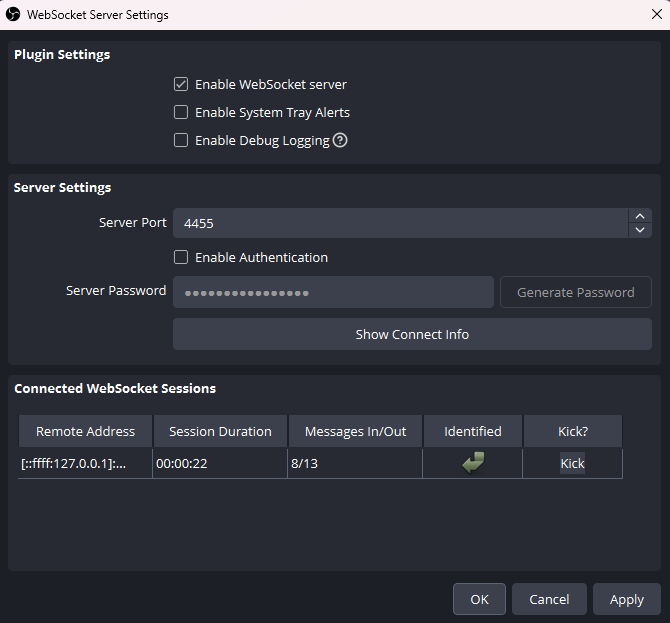
In OBS, you will need to allow the Streamer.bot WebSocket to interact with it. You can find this on the top bar in:
Tools > WebSocket Server Settings
Copy your settings over from this tab to Streamer.bot. You can set a password and see if your connection has been successful.
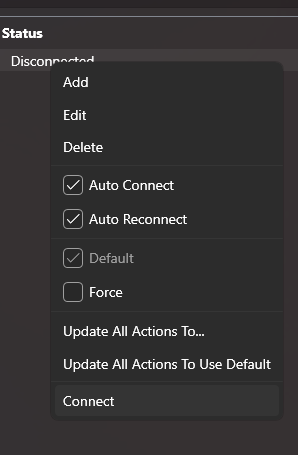
PRO-TIP: Right-click your connection and make sure it’s connected as the default setting is disconnected .
Step 3: Connect To Your Streaming Platform
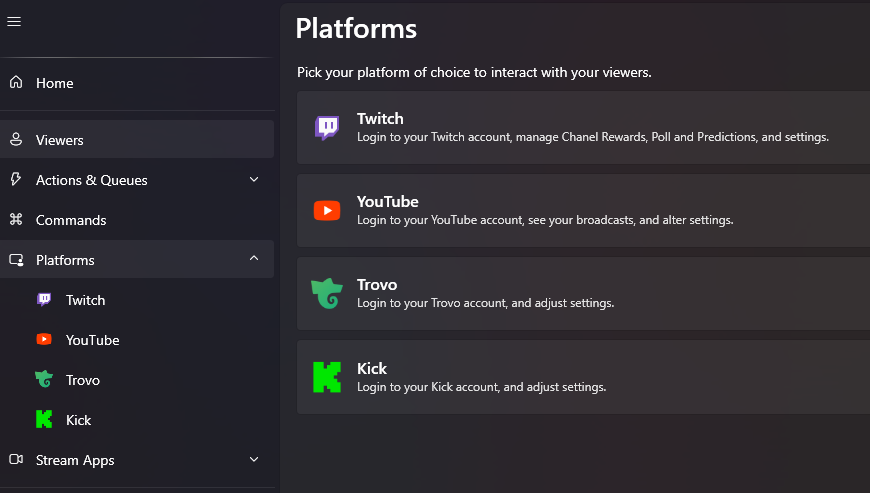
Connecting to your streaming platform is super easy too. Click on the “Platforms” tab and choose the platform of your choice. In this example We are connecting to Twitch.

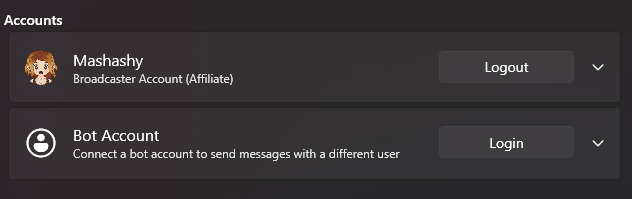
Simply click on the “Login” button and follow it to the authorisation page. Once you’ve allowed this on the web page, your profile should appear on Streamer.bot.
Step 4: You’re Good To Go
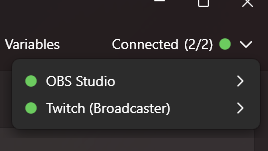
You can check if your accounts are connected to Streamer.bot by checking the connections in the top right-hand corner of the Streamer.bot app.
Once you’re connected, it’s time to add commands.
Streamer.bot Next Steps
Check out our other tutorials for hints and tips on how to utilise Streamer.bot to improve your streams.
Want More Tutorials?
Looking to level up your content creation more? Check out our other tutorials now.